
| Mt Hooker Wilderness Area |
Photos and text by Jonathan Carr
A 9-day tramping/climbing trip in NZ wilderness. No huts, no tracks, no yellow snow.
For an ordered account, follow the arrow at the bottom of the page.

|

|
| Day 1 - The Paringa river (39k) | Tunnel Creek Falls - Paringa river (40k or 70k) |

| The rock bivy at the head of the Paringa (51k) |
|

|
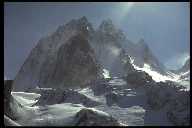
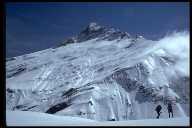
| "Gale force Southerlies about the tops" - Traversing beneath Mt McCullough (18k) | Crossing from the Paringa into the Clarke catchment - checking out the cornice before descending! (42k) |
| Mt Hooker from the Solution Range, just above Mark's Flat (43k) |
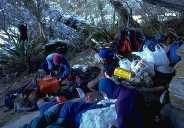 Under the Paringa rock biv (77k) | |

| Near the West peak of Mt Hooker looking North to Mt Cook (42k) |
 |
 |
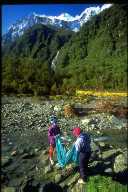
| Drying out in the upper Otoko - a rare moment of sunshine (38k) | |

| |
| Crossing Avalanche debris (33k) | |

|
|
| Mad kea - Lower Otoko (52k) | Deer Flat, Lower Otoko River (45k) |

| |
| On the ridge to the West peak (21k) | |